Installing Python
Introduction
In this post we will learn about installing Python on Windows, Mac and Linux.
Windows
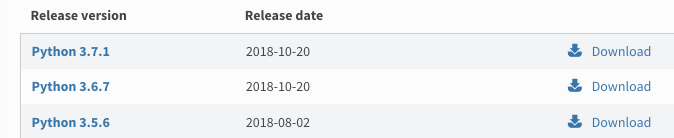
Download python from https://www.python.org/downloads/. You will see multiple versions of Python listed over there. 3.7.1 is the latest stable version at the time of writing this post. Select 3.7.1 link as shown in the below figure.
After selecting a particular version of Python you will see all the platform specific setup files over there like the one below.
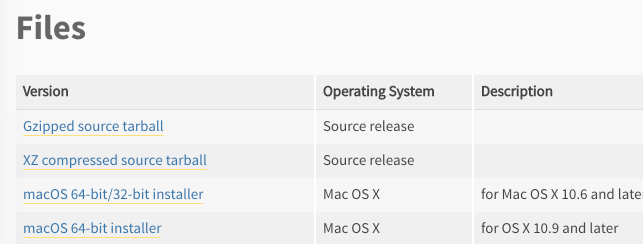
Select the version based on your OS type. If it windows 64 bit, just select Windows x86-64 executable installer. for windows 32 bit, select Windows x86 executable installer. After downloading double click the installer. Make sure that you select ‘Add Python 3.7 to PATH’ as shown in the below figure. This way you can access python from command prompt.

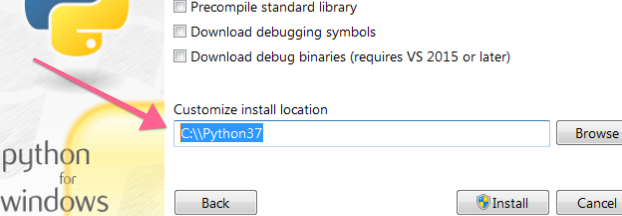
Also click ‘Customize Installation’ to change the Python installation path. To make Python installation easily accessible choose C:\Python37 as a installation directory as shown below.
Linux
Python installation method can be slightly different for different Linux distribution. But it’s more or less same if we install it from source. Use the below commands to install Python in Linux.
| |
Mac
Better way to install Python on Mac is to use homebrew
| |
to install python 3
| |
We can also install python by compiling from source as described in the above Linux installation section.
Conclusion
After installing Python, open command prompt in windows and then type python. This will start the interpreter (See below picture). In mac, open Terminal app and then type python. In Linux, open console and try the same thing. If you don’t get any error, it means you have successfully installed the Python.
